MQ135 Gas Sensor: How It Works & How to Use It with Arduino
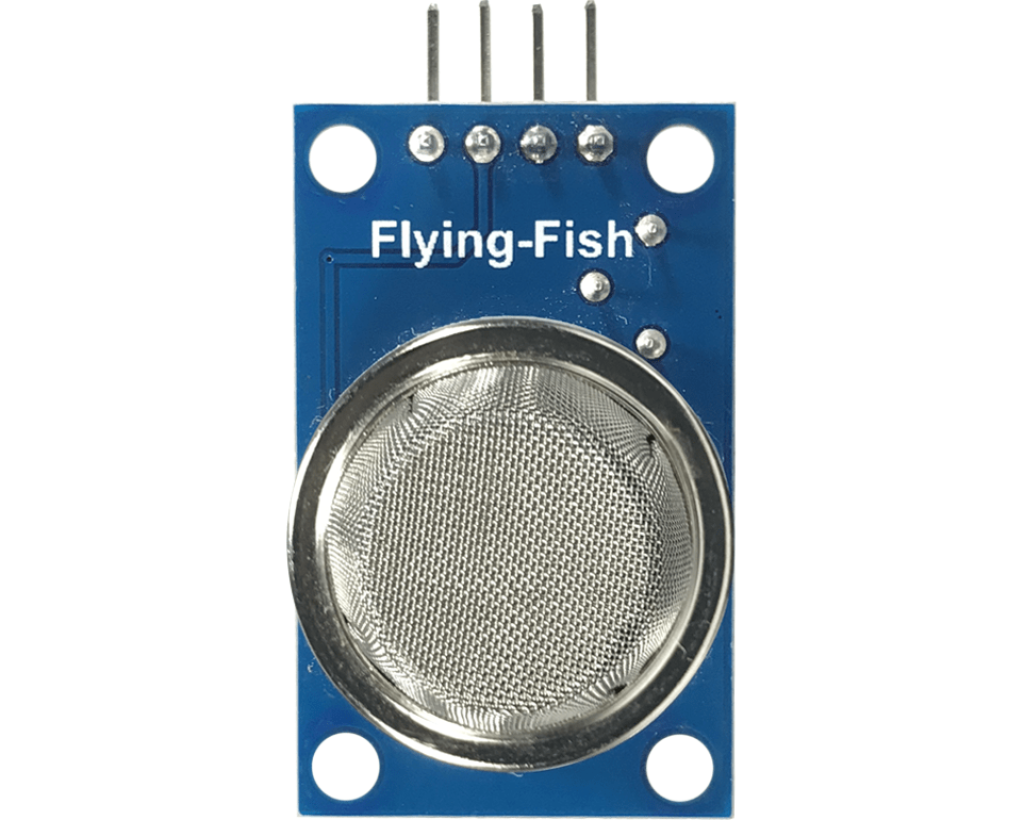
This tutorial will cover what I have learned about the MQ135 gas sensor and its application with Arduino. The MQ135 gas sensor is capable of detecting ammonia gas, nitrogen oxides, alcohol, benzene, smoke, carbon dioxide, and other flammable gases. There are many varieties of MQ sensors, and each is capable of detecting specific types of gases.
What Is Inside the MQ135 Gas Sensor
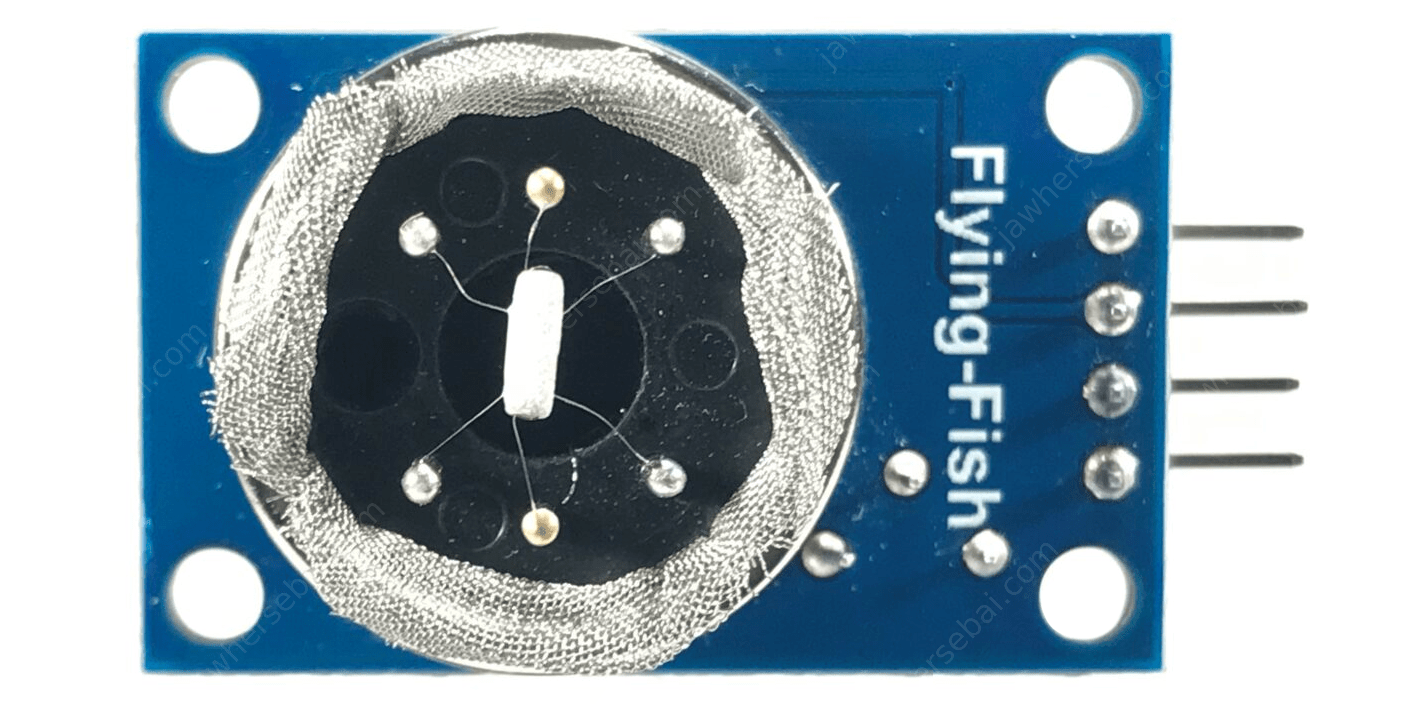
Inside the MQ135 gas sensor is a unique resistor that changes its electrical resistance when exposed to changes in the surrounding chemical environment. It consists of a ceramic tube with an internal heating coil to achieve the required operating temperature and an external layer of resistive material, which we denote by the chemical formula SnO2.
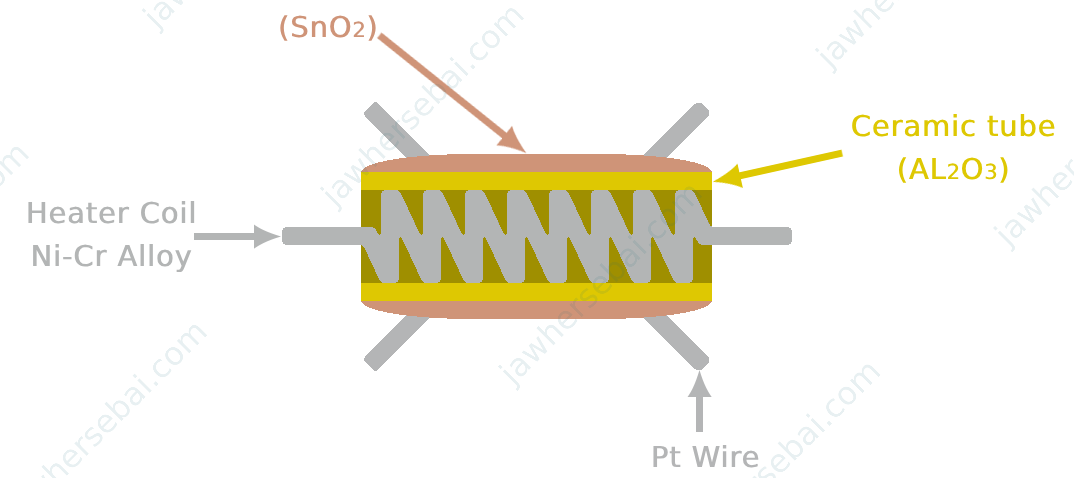
SnO2, or tin dioxide, is known for its electrical conductivity, as conductive materials have a free electron in the outer shell of their atoms, which moves freely in all directions between the neighboring atoms. Conversely, non-electrically conducting materials lack this free electron, which accounts for their electrical resistance.

How It Works
As the temperature of the SnO2 material rises, free electrons are attracted to oxygen molecules in the air, reducing the number of available electrons and thus increasing the material’s resistance. On the other hand, when certain gases are present, they reduce the concentration of oxygen, freeing up electrons and leading to a decrease in the resistance of SnO2.
Sensor Pinout
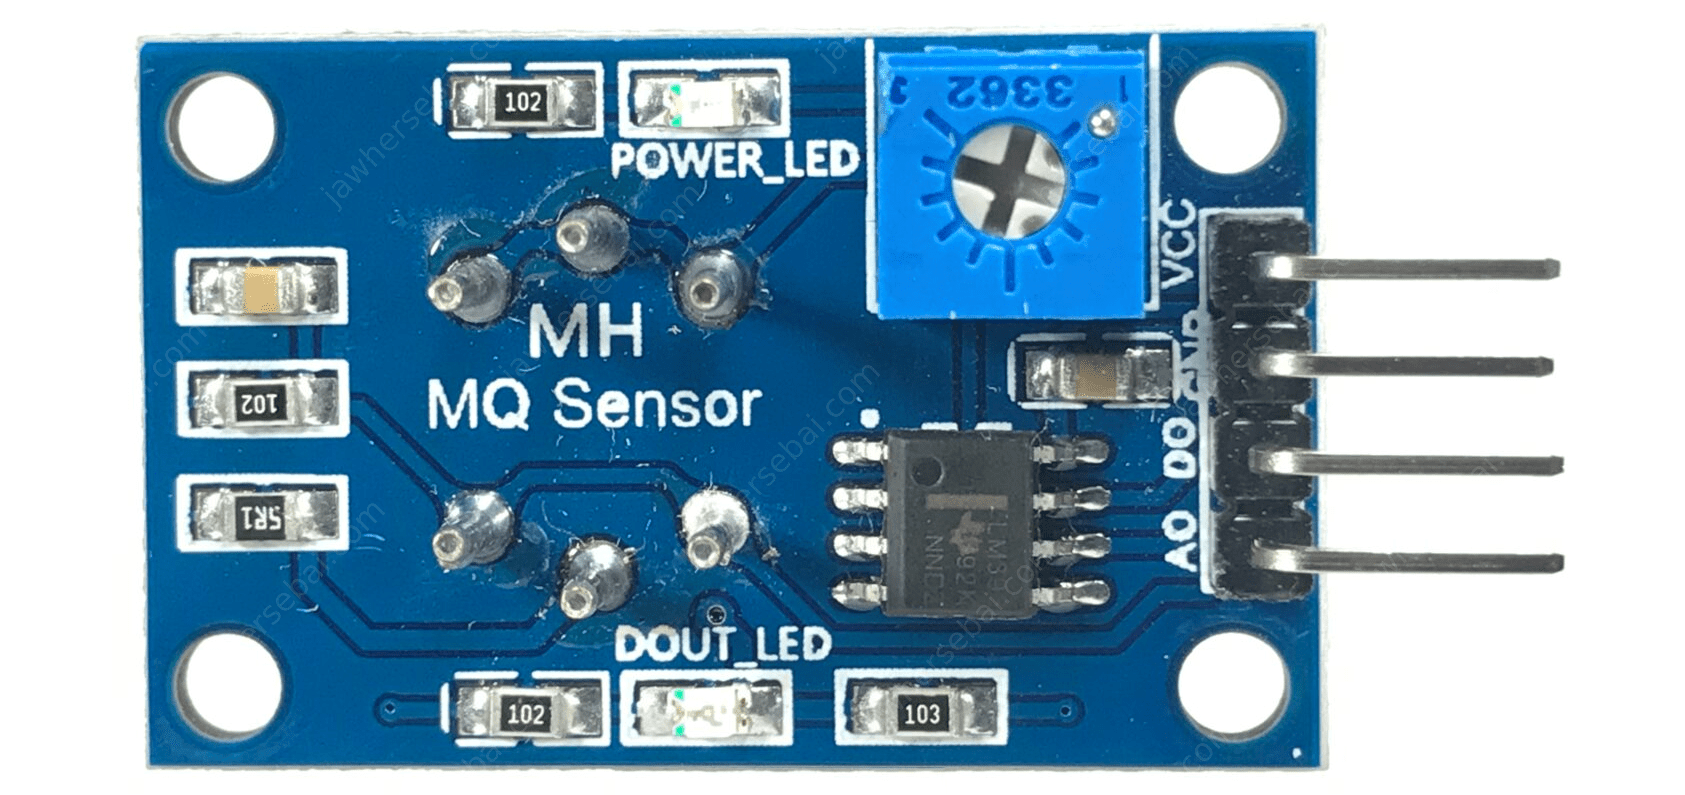
The MQ135 gas sensor has 4 pins, VCC and GND, to power it up with 5V. “DO” is the digital output pin, and it will output 0V or 5V according to the potentiometer level, which acts as a threshold for the pin to change its state. In other words, if the sensed signal is lower than the potentiometer value, then the DO pin will output 5V, and if the sensed signal is higher than the potentiometer value, then the DO pin will output 0V. The “AO” is the analog output pin, and it will output a sinusoidal signal according to the gas level in the air.
Gas Detection Using MQ135 Sensor and Arduino
In this example, we will observe the various types of gases detected by the MQ135 gas sensor, represented as a curve through pin AO. Connect the sensor to the Arduino board as shown below, then upload the provided sketch. Once done, allow the sensor to warm up for 5 minutes to ensure more accurate readings, then go to Tools > Serial Plotter.
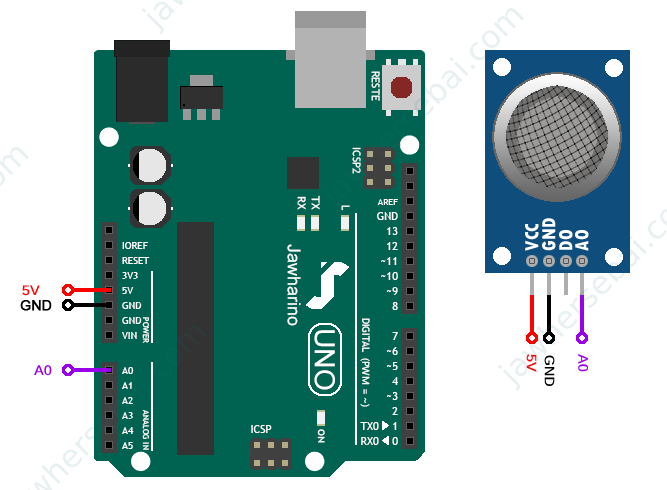
Arduino Sketch
int sensorPin = A0;
float sensorValue;
void setup() {
  Serial.begin(9600);
  pinMode(sensorPin, INPUT);
}
void loop() {
  sensorValue = analogRead(sensorPin);
  Serial.println(sensorValue);
}
In my experience, leaving the sensor in clean air results in readings between 100 and 150. Blowing on it produces readings between 150 and 200, and bringing an alcohol-soaked tissue nearby causes the value to spike to 600 before stabilizing at 260.
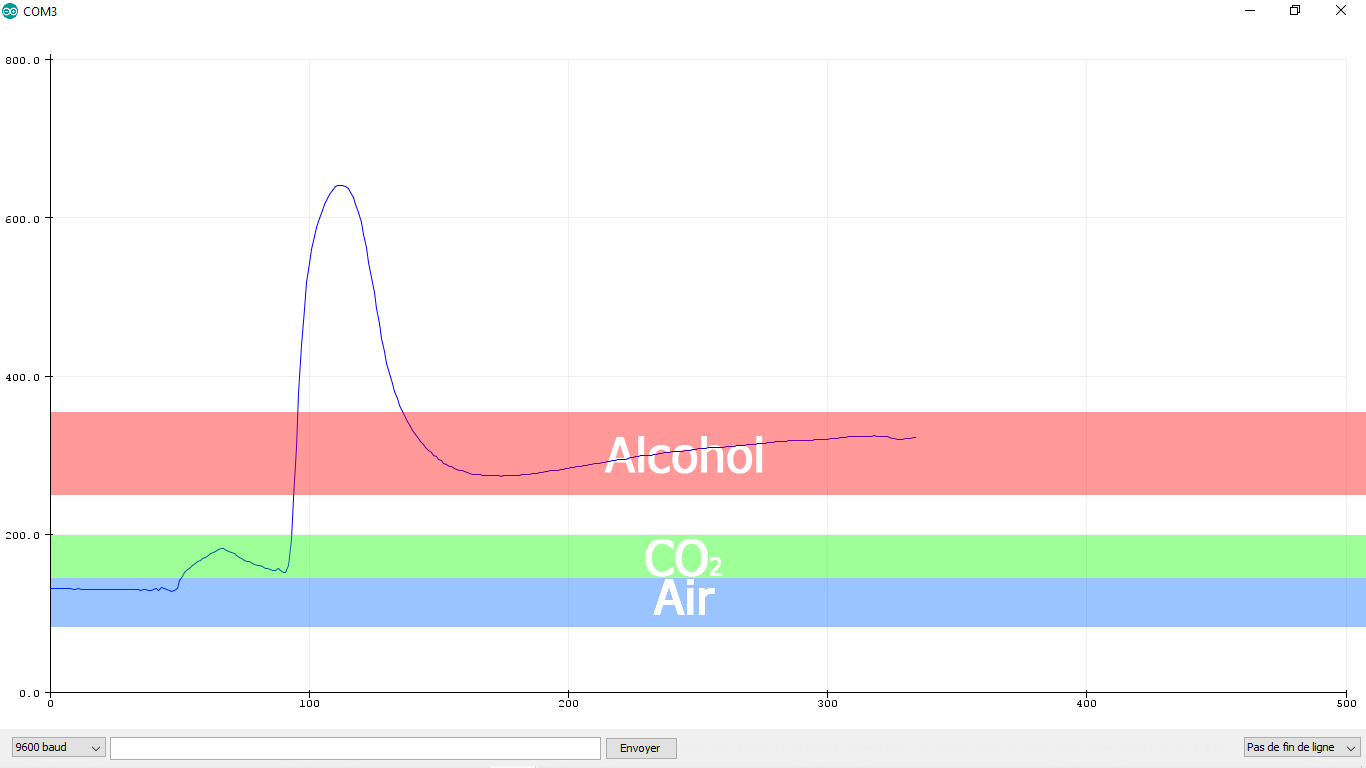
Using these values, you can modify the sketch slightly to activate an LED in the presence of alcohol. Simply connect an LED to any digital pin on the Arduino board and follow the subsequent sketches if you want to utilize the AO pin or the DO pin.
Using AO Pin
int sensorPin = A0;
int redLed = 3;
float sensorValue;
void setup() {
  pinMode(sensorPin, INPUT);
  pinMode(redLed, OUTPUT);
}
void loop() {
  sensorValue = analogRead(sensorPin);
  if (sensorValue>250)
  {
    digitalWrite(redLed, HIGH);
  }else
  {
    digitalWrite(redLed, LOW);
  }
}
Using DO Pin
int sensorPin = 2;
int redLed = 3;
int sensorValue;
void setup() {
  pinMode(sensorPin, INPUT);
  pinMode(redLed, OUTPUT);
}
void loop() {
  sensorValue = digitalRead(sensorPin);
  if (sensorValue == LOW)
  {
    digitalWrite(redLed, HIGH);
  }else
  {
    digitalWrite(redLed, LOW);
  }
}
Sources
- MQ135 Gas Sensor Datasheet: olimex.com
