HC-05 Bluetooth Module with Arduino: Setup Guide and Wireless Car Project

Welcome! In this tutorial, we’ll learn how to use the HC-05 Bluetooth module with Arduino. By the end, you’ll know how to set up the module and make it work with your Arduino projects for wireless communication.
Specifications

- We use the STATE pin to check whether the Bluetooth module is connected or not.
- RX is the pin to receive the data.
- TX is the pin to transmit the data.
- GND and Vcc are used to power up the module with a voltage between 3.6V and 6V.
- EN is the key pin to enter the AT command mode, functioning similarly to the onboard push button of the module.
Changing the Name and the Password of the Module
AT Command Mode
The HC-05 Bluetooth module operates in two modes: Data Mode, where it sends and receives serial data, and AT Command Mode, where you can change default settings like the module’s name and password.
To enter AT command mode, follow these steps:
- Make sure your Arduino board has an empty sketch uploaded, or upload an empty one.
- Connect the HC-05 to your Arduino board as shown below.
Press and hold the onboard button on the Bluetooth module while plugging the Arduino board into your computer, or connect the EN pin of the Bluetooth module to the Arduino’s 3.3V pin instead of using the button.
You should see an LED on the Bluetooth module blinking every two seconds, indicating that you are now in the AT command mode.

Once you’ve entered AT command mode, open the Arduino IDE and then the serial monitor. Set the baud rate to 38400 bps, the default speed for the HC-05 in AT command mode.
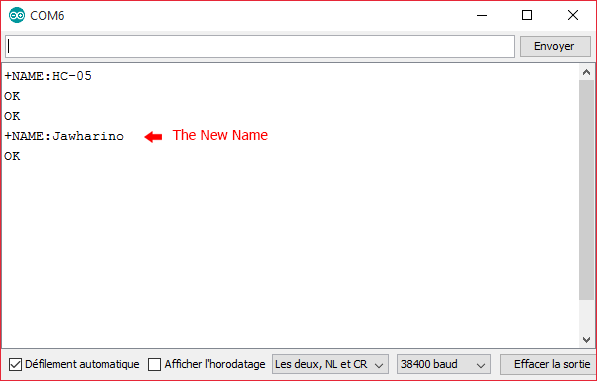
To know the name of the Bluetooth module, type in the top bar AT+NAME? Then press the enter key. The Bluetooth module’s default name will appear, followed by an “OK” notification.

If you are getting no response in the serial monitor, try to connect the RX pin of the Bluetooth module to the RX pin of the Arduino through a voltage divider, as this might fix your problem.

To change the name, type AT+NAME= and type the name that you want, then press the enter key. You will get an “OK” notification confirming that your name has been changed.

To check whether the name was changed or not, type AT+NAME? again and press the enter key.
To know the Bluetooth module password, type AT+PSWD? Then press the enter key. The Bluetooth module’s default password will appear, followed by an “OK” notification.
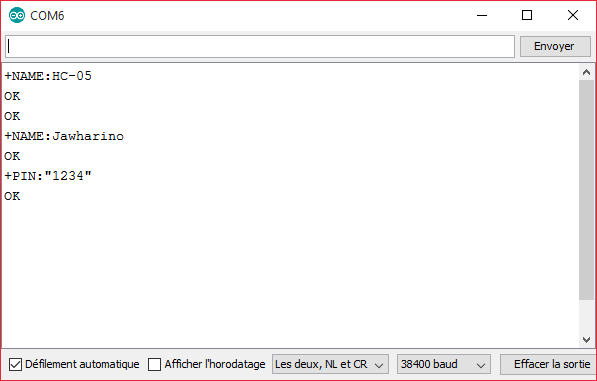
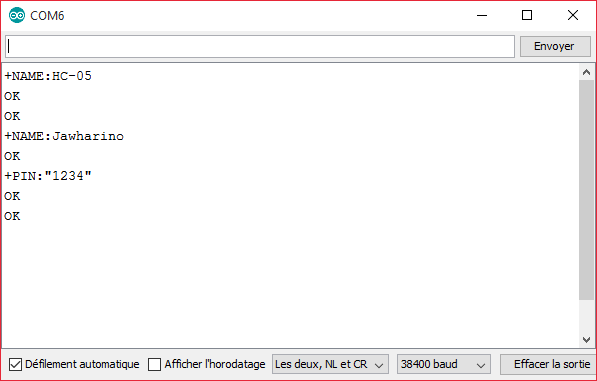
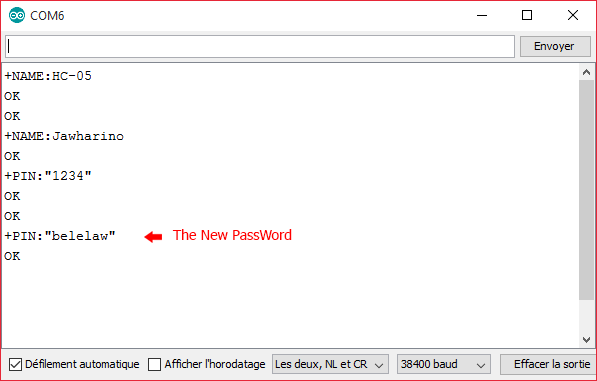
To change the password, type AT+PSWD= and type your desired password between two quotation marks.
Press the enter key, and you will get an “OK” notification confirming that your password has been changed.
To check whether the password was changed or not, type again AT+PSWD? and press the enter key.
AT-Command Set
AT+NAME to know the name of the Bluetooth module.
AT+PSWD to know the password of the Bluetooth module.
AT+UART to know the baud speed of the Bluetooth Module in the Data Mode.
AT+ROLE to know the role of the Bluetooth module whether it is master or slave(master = 1, slave = 0).
AT+CMOD to know how many devices your Bluetooth module can pair with (connected to only one device = 0, connected to many devices = 1).
AT+ADDR to know the address of the Bluetooth module.
AT+RESET to rest the Bluetooth module
AT+ORGL to restore default settings of Bluetooth module
Controling a Car Using a Smartphone
To control our robot car using a smartphone, we’ll be utilizing an Android application called Arduino-Bluetooth-RC-Car. This application features a control panel that lets us move the car forward and backward, turn left and right, adjust speed, and toggle the lights, horn, and emergency triangle. Each button press sends a specific character, which the Bluetooth module receives and the Arduino uses to control the car.

Connect the components as illustrated below and use the provided Arduino sketch.

Arduino Sketch
int ENA=11;
int IN1=10;
int IN2=9;
int IN3=8;
int IN4=7;
int ENB=6;
int F=3;
int B=2;
char x;
int SPEED=0;
void setup() {
  pinMode(ENA, OUTPUT);
  pinMode(IN1, OUTPUT);
  pinMode(IN2, OUTPUT);
  pinMode(IN3, OUTPUT);
  pinMode(IN4, OUTPUT);
  pinMode(ENB, OUTPUT);
  pinMode(F, OUTPUT);
  pinMode(B, OUTPUT);
  Serial.begin(9600);
}
void backward()
{
  digitalWrite(IN1, LOW);
  digitalWrite(IN2, HIGH);
  digitalWrite(IN3, HIGH);
  digitalWrite(IN4, LOW);
}
void forward()
{
  digitalWrite(IN1, HIGH);
  digitalWrite(IN2, LOW);
  digitalWrite(IN3, LOW);
  digitalWrite(IN4, HIGH);
}
void right()
{
  digitalWrite(IN1, LOW);
  digitalWrite(IN2, HIGH);
  digitalWrite(IN3, LOW);
  digitalWrite(IN4, HIGH);
}
void left()
{
  digitalWrite(IN1, HIGH);
  digitalWrite(IN2, LOW);
  digitalWrite(IN3, HIGH);
  digitalWrite(IN4, LOW);
}
void loop() {
if(Serial.available()>0){
    x=Serial.read();
    Serial.println(x);
  }
  if (x=='0')
  {
    SPEED=0;
  } else if (x=='1')
  {
    SPEED=10;
  } else if (x=='2')
  {
    SPEED=25;
  } else if (x=='3')
  {
    SPEED=50;
  } else if (x=='4')
  {
    SPEED=75;
  } else if (x=='5')
  {
    SPEED=100;
  } else if (x=='6')
  {
    SPEED=125;
  } else if (x=='7')
  {
    SPEED=150;
  } else if (x=='8')
  {
    SPEED=175;
  } else if (x=='9')
  {
    SPEED=200;
  } else if (x=='q')
  {
    SPEED=230;
  } else if (x=='D')
  {
    SPEED=255;
  }
  if (x=='S')
  {
    digitalWrite(B, LOW);
    analogWrite(ENA, 0);
    analogWrite(ENB, 0);
    forward();
  }
  if (x=='F')
  {
    analogWrite(ENA, SPEED);
    analogWrite(ENB, SPEED);
    forward();
  }
    if (x=='B')
  {
    digitalWrite(B, HIGH);
    analogWrite(ENA, SPEED);
    analogWrite(ENB, SPEED);
    backward();
  }
    if (x=='R')
  {
    analogWrite(ENA, SPEED);
    analogWrite(ENB, SPEED);
    right();
  }
  if (x=='L')
  {
    analogWrite(ENA, SPEED);
    analogWrite(ENB, SPEED);
    left();
  }
  if (x=='W')
  {
    digitalWrite(F, HIGH);
  }
  if (x=='w')
  {
    digitalWrite(F, LOW);
  }
  if (x=='U')
  {
    digitalWrite(B, HIGH);
  }
  if (x=='u')
  {
    digitalWrite(B, LOW);
  }
}