How MQ135 Gas Sensor Works And How To Use It With Arduino

The MQ135 gas sensor is capable to detect ammonia gas, nitrogen oxides, alcohol, benzene, smoke, carbon dioxide, and other flammable gases. there are a lot of kinds that resemble this sensor and every one of them is capable to detect certain types of gases.
What Is Inside The MQ135 Gas Sensor
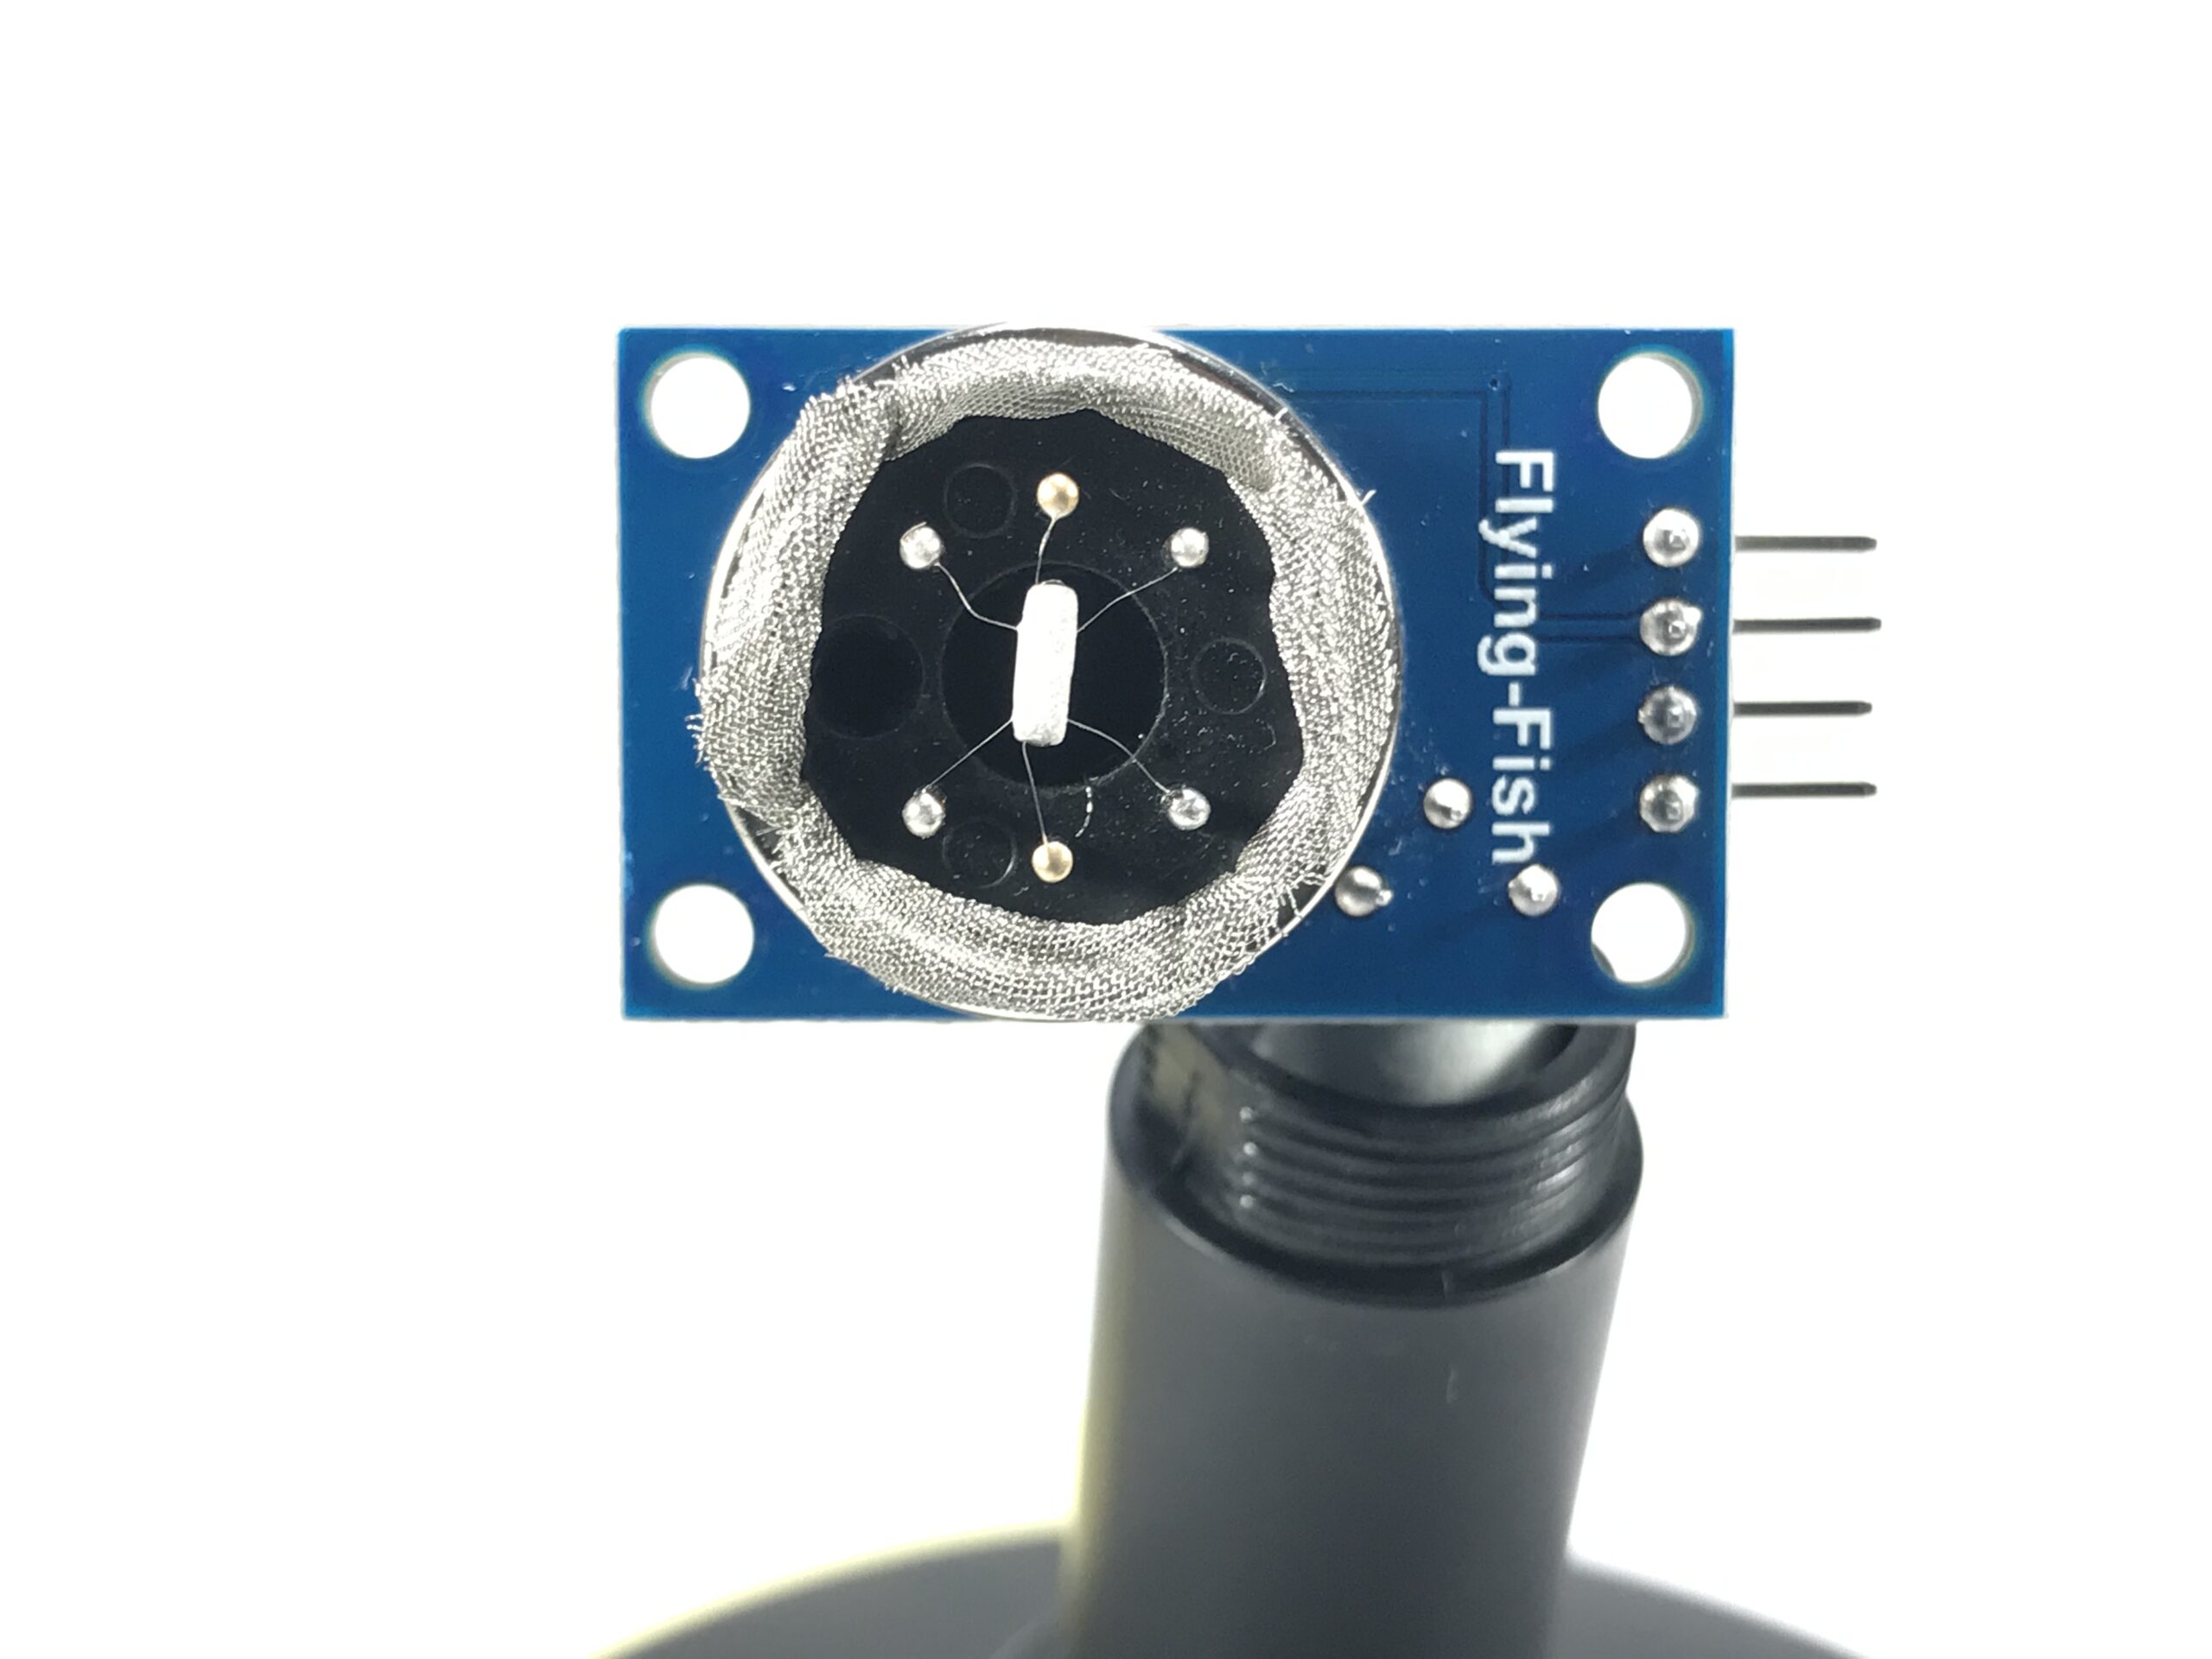
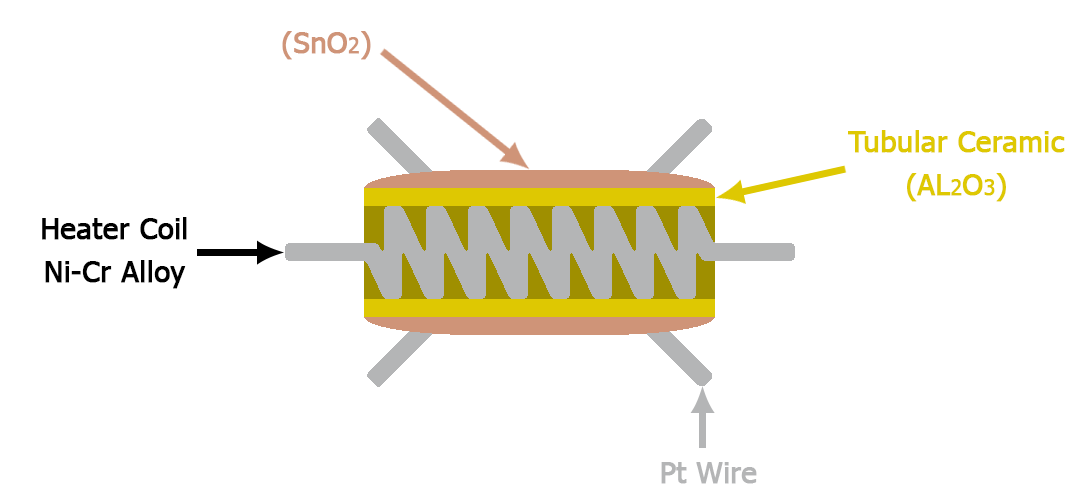
Inside the MQ 135 gas sensor, there is an element used to sense the gas in the air based on the variation of its resistance. It is called a chemiresistor and in our sensor is the Tin Dioxide which we denote by the chemical formula (SnO2), The change of resistance will be related to the temperature of that material and for that, the sensing element is made of a tube with a coil inside it to produce heat and is covered with a layer of the tin dioxide (SnO2).
In the next picture, The Pt wires will be the poles of the SnO2 Layer as any other resistor.
Reminder
All electrically conducting substances have in the outer shell of their atom a free electron that is moving freely in all directions between the neighboring atoms.
On the other hand, the non-electrically conducting substances do not have a free electron and that is what explains their resistivity to electricity.
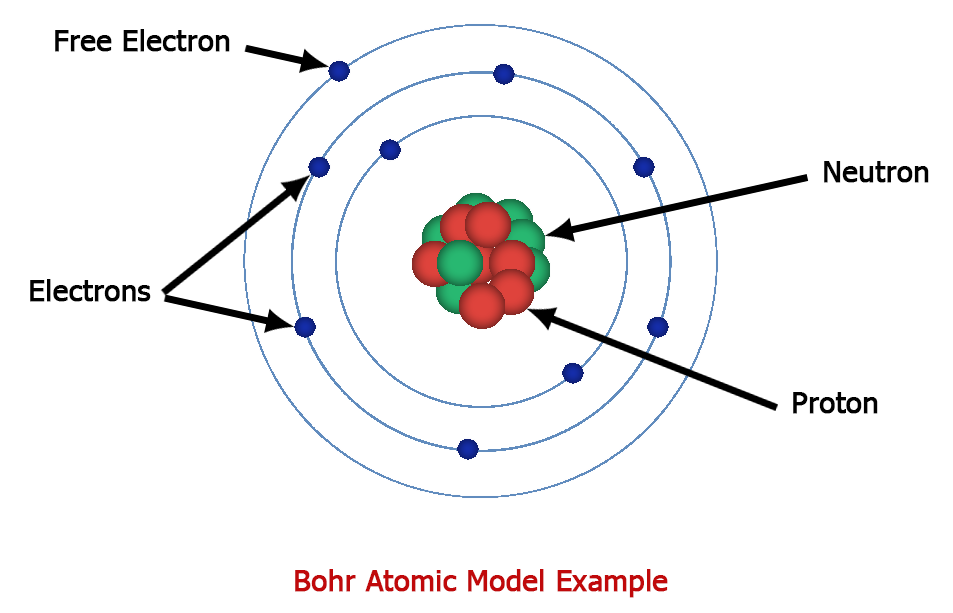
For example, The way free electrons move in a copper wire when we apply an electric potential to them, will not be random anymore and will take one direction. The flow of those electrons is what defines the electric current So the least electrons lead to a high resistivity and the more electrons lead to low resistivity.
How MQ135 Gas Sensor Works
When the temperature of the SnO2 material rises, the free electrons will be attracted to oxygen particles of the surrounding air, there will be not many available electrons left thus the increase of this material resistance.
In the presence of a certain gas, the oxygen level will decrease and the electrons will go back to being free, thus the decrease of the SnO2 resistance.
MQ135 Gas Sensor Pinout
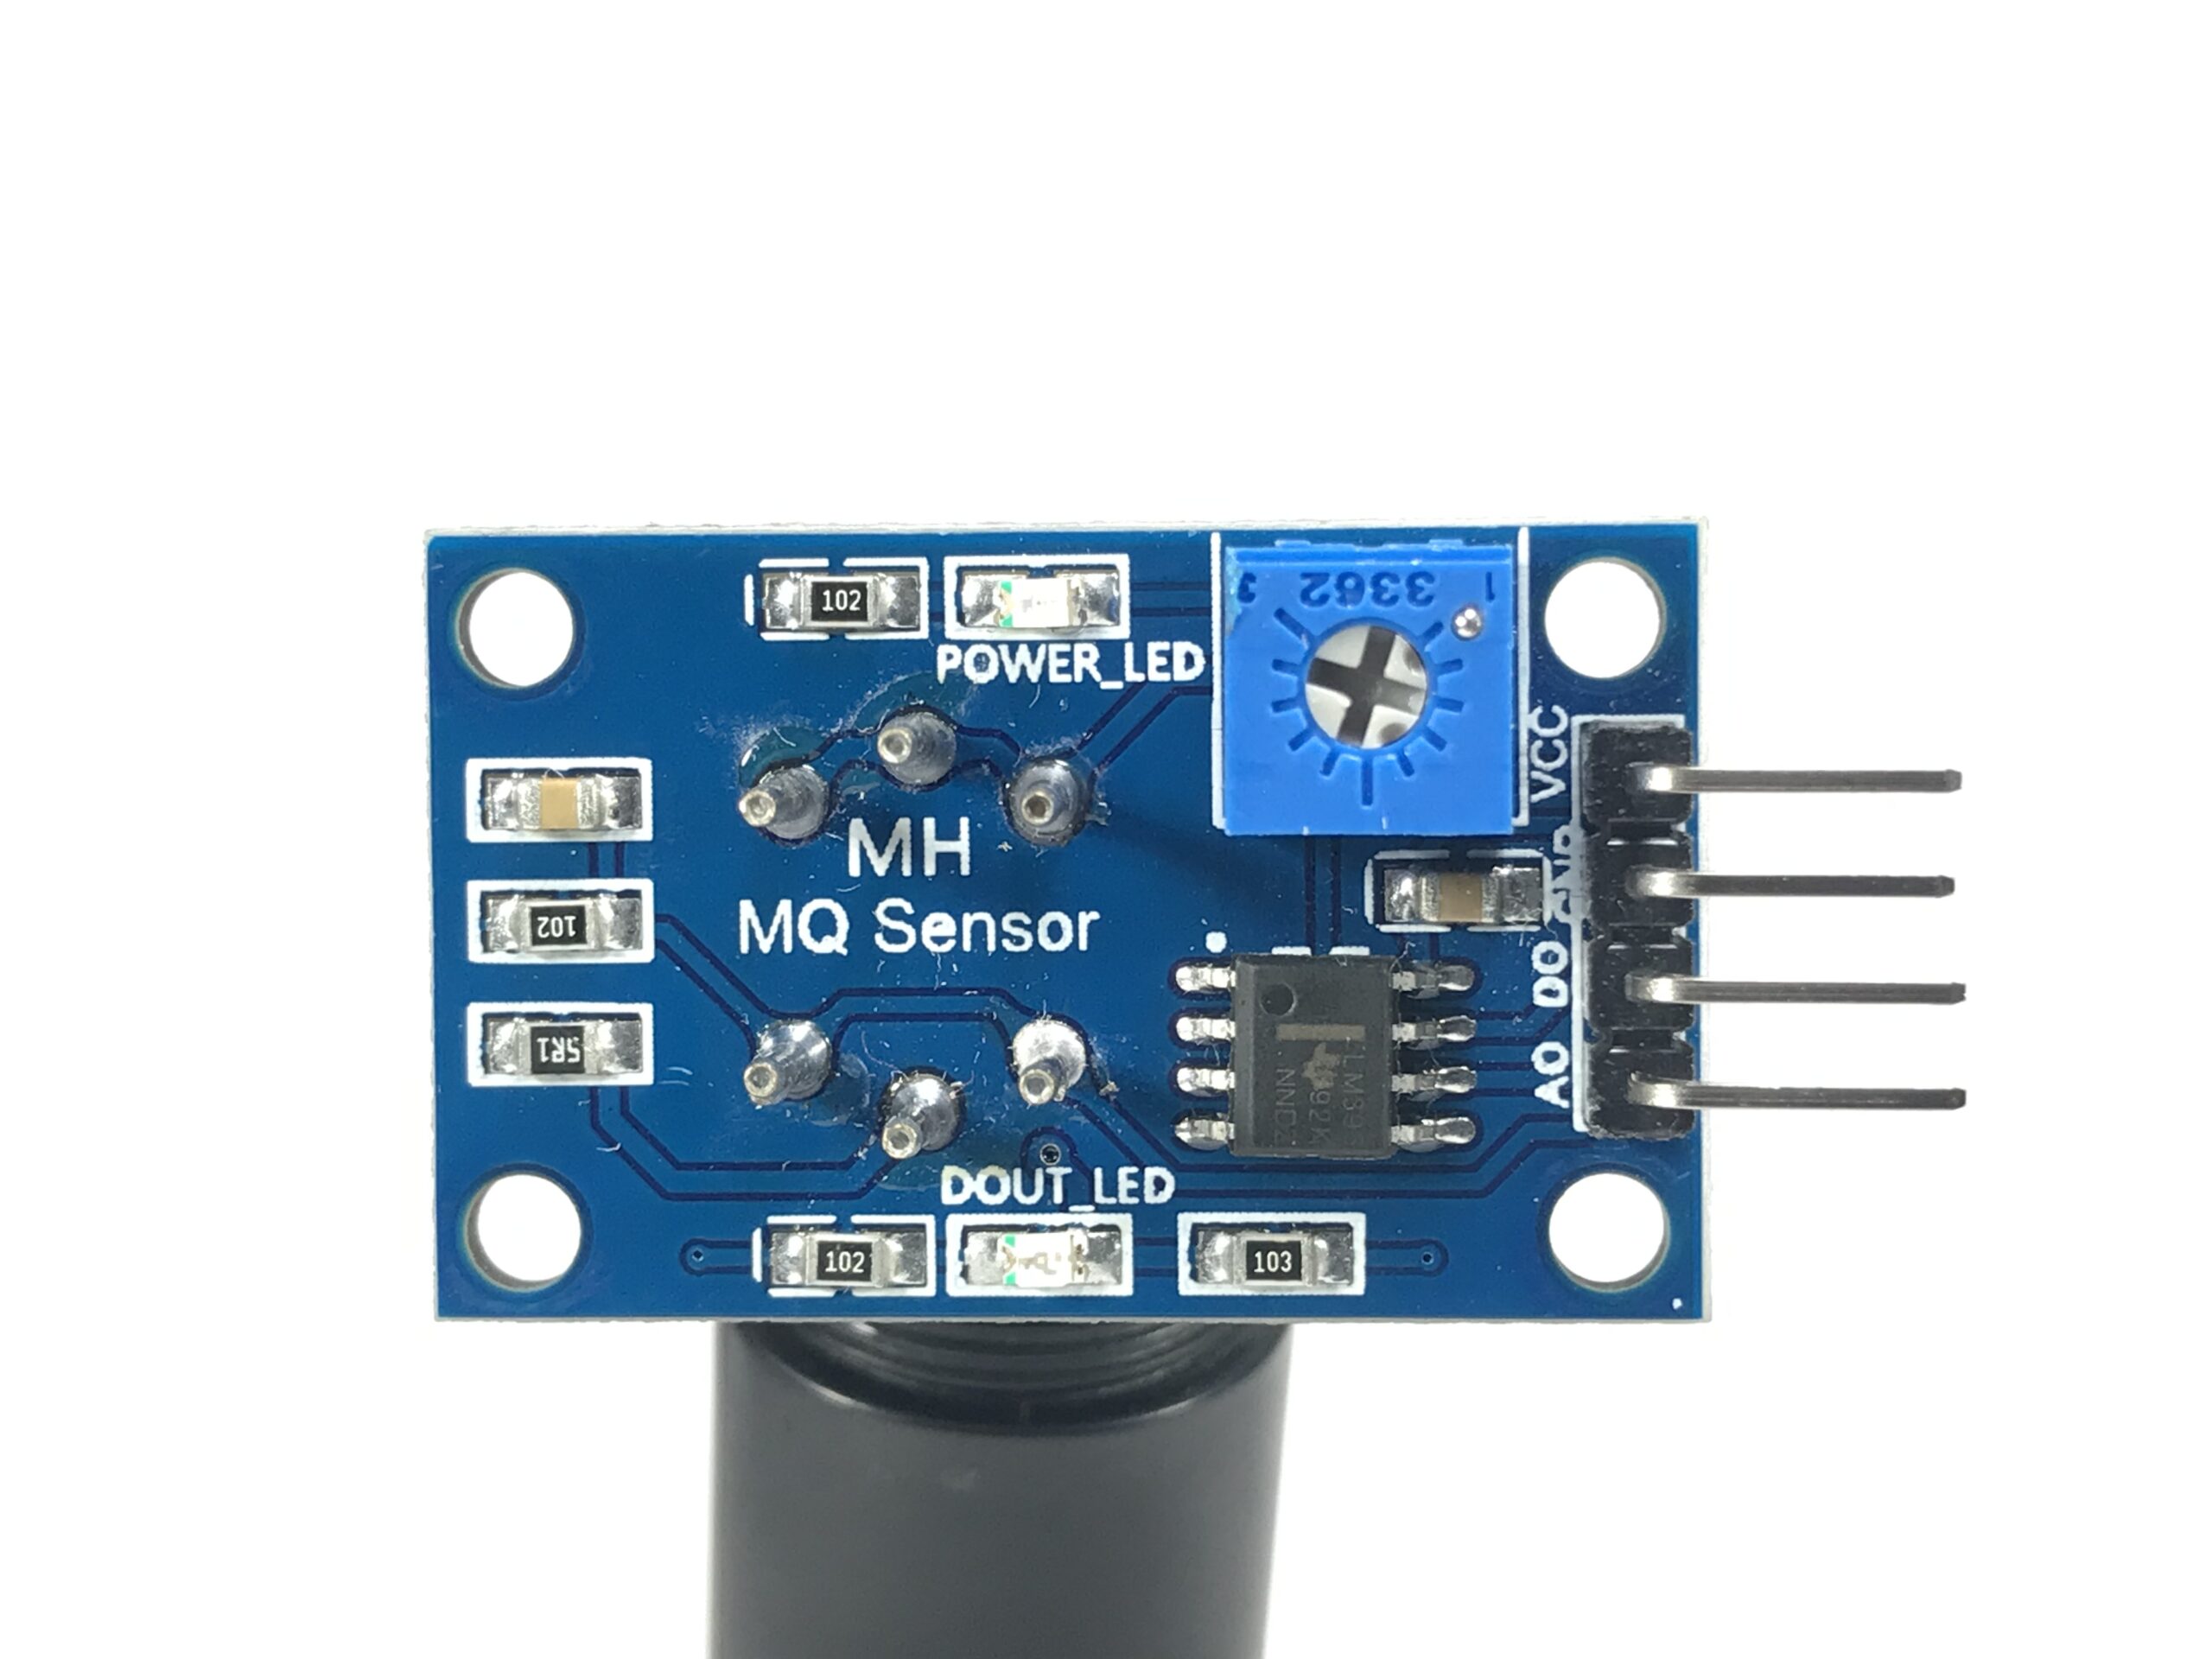
This sensor has 4 pins VCC and GND to power it up with 5V, “DO” is the digital output and it will output 0V or 5V according to the potentiometer level, The Potentiometer will be acting like a threshold for the “DO” pin to change its state, So when you turn it to the left you will decrease its value and when you turn it to the right you will increase it. If the sensed signal is lower than the potentiometer value then D0 will output 5V and if is higher then D0 will output 0V.
“AO” is the analog output it will output a sinusoidal signal changing by time according to the gas level in the air.
Using MQ135 Gas Sensor With Arduino
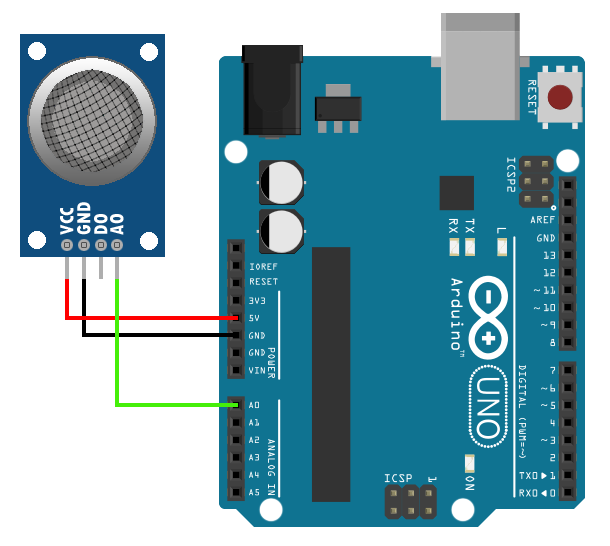
If you would like to see the pin AO value connect the sensor as shown in the next schematic then upload the following sketch. When you turn on the power leave the sensor to warm up for 5 minutes to give good readings.
int sensorPin = A0;
float sensorValue;
void setup() {
Serial.begin(9600);
pinMode(sensorPin, INPUT);
}
void loop() {
sensorValue = analogRead(sensorPin);
Serial.println(sensorValue);
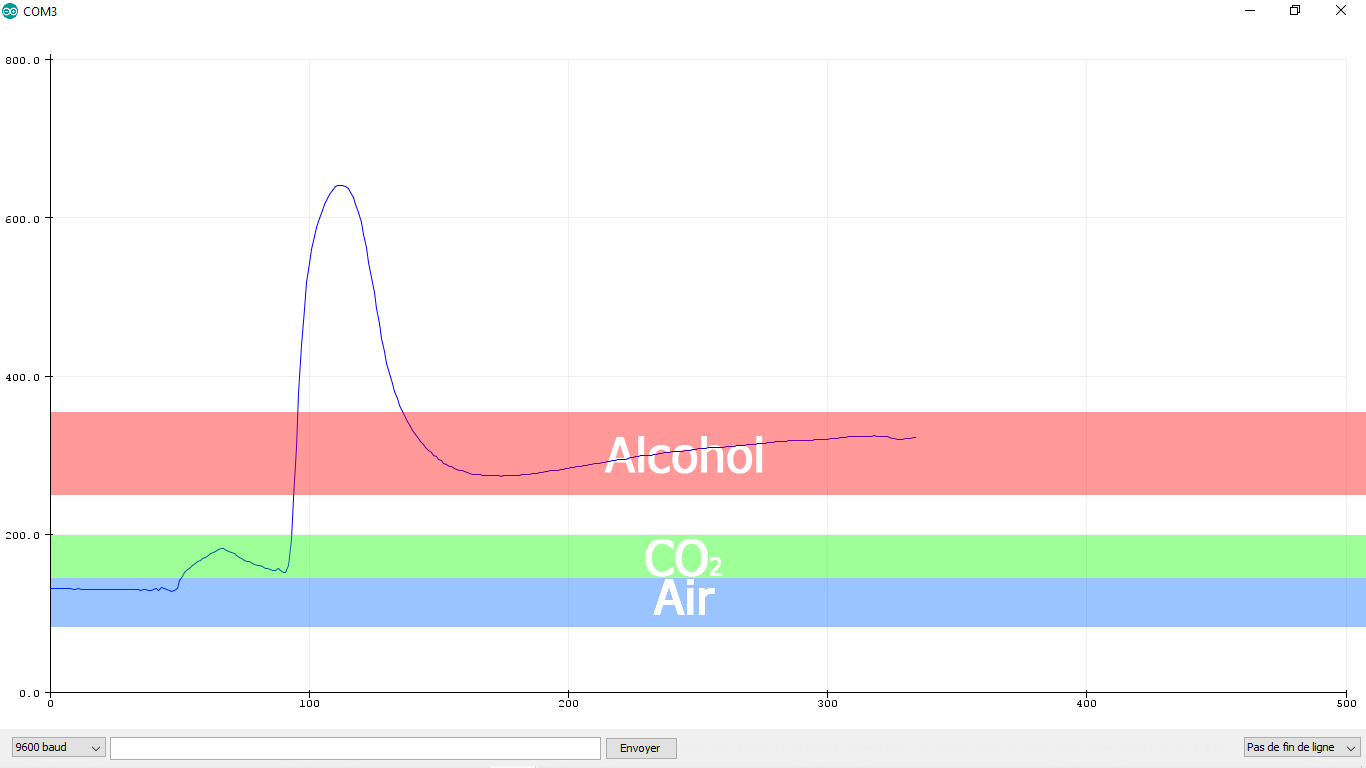
} After you upload the sketch go to Tools > Serial Plotter and then you will see a signal like this varies according to the gas type.
for me when I leave the sensor in clean air the value will be between 100 and 150 when I blow it the value will be between 150 and 200 and when I bring alcohol the value will jump to 600 it will stabilize in 260
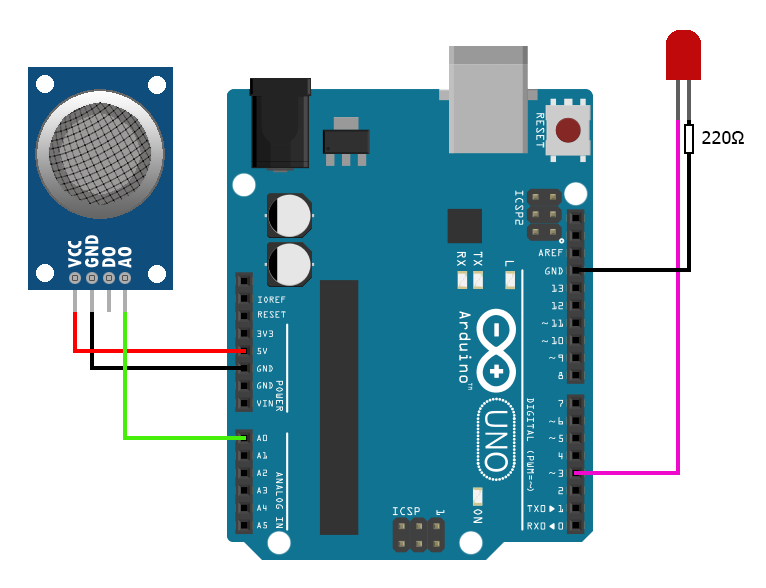
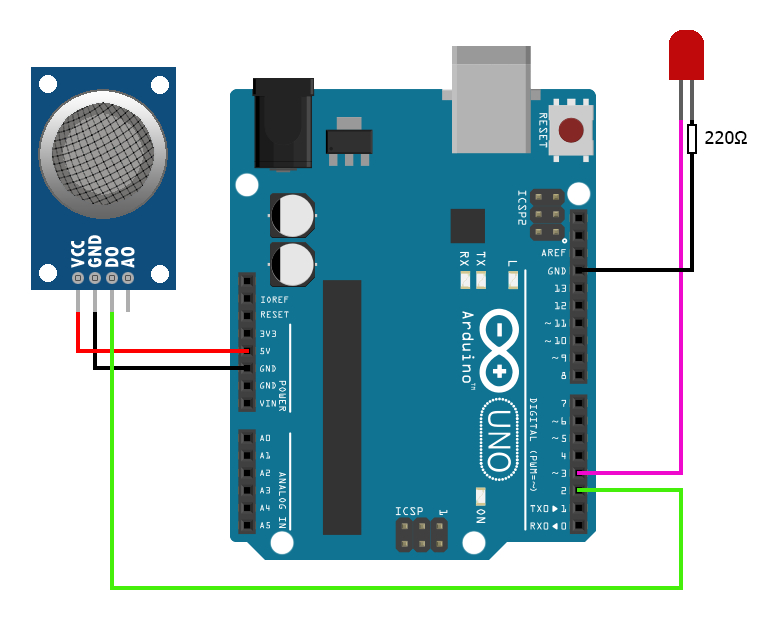
with these numbers we can add a condition to the code to turn on an LED when there is alcohol, here are the next two schematics and sketches you can use when using the AO pin and DO pin0
AO Pin
int sensorPin = A0;
int redLed = 3;
float sensorValue;
void setup() {
  pinMode(sensorPin, INPUT);
  pinMode(redLed, OUTPUT);
}
void loop() {
  sensorValue = analogRead(sensorPin);
  if (sensorValue>250)
  {
    digitalWrite(redLed, HIGH);
  }else
  {
    digitalWrite(redLed, LOW);
  }
}
DO Pin
int sensorPin = 2;
int redLed = 3;
int sensorValue;
void setup() {
  pinMode(sensorPin, INPUT);
  pinMode(redLed, OUTPUT);
}
void loop() {
  sensorValue = digitalRead(sensorPin);
  if (sensorValue == LOW)
  {
    digitalWrite(redLed, HIGH);
  }else
  {
    digitalWrite(redLed, LOW);
  }
}