How to Make an Arduino at Home

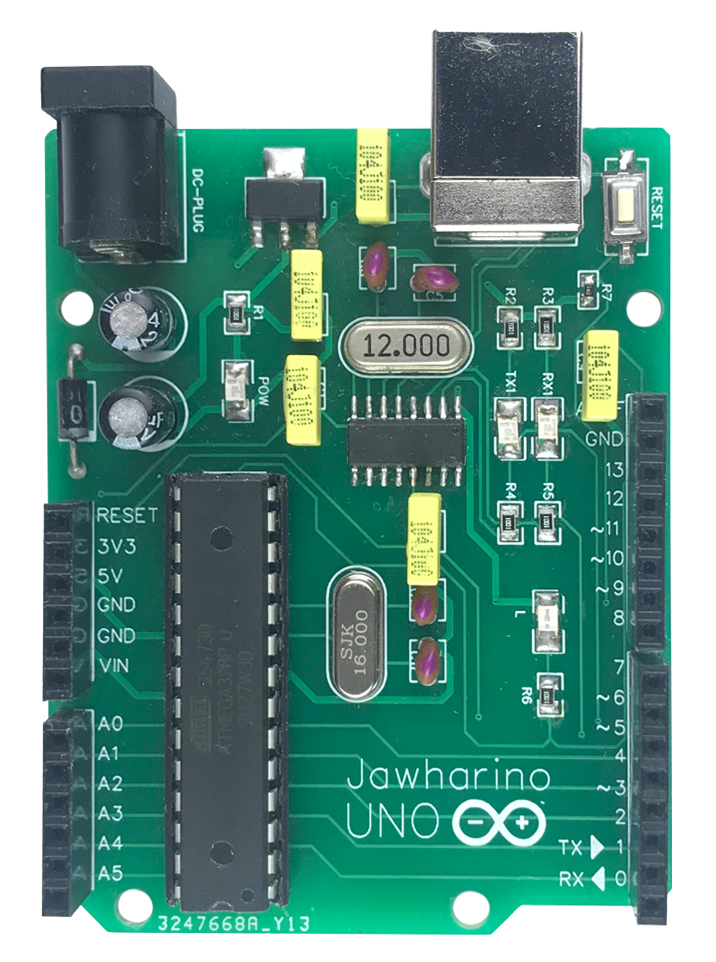
In this blog post, I am going to share with you how I made my own Arduino UNO board at home utilizing the ATMEGA328P-U Microcontroller.
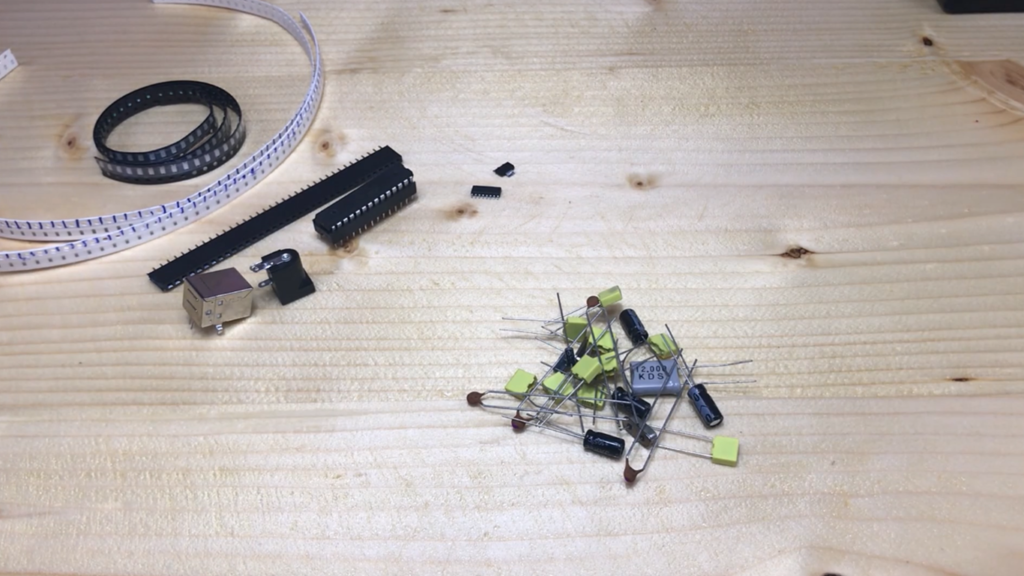
I initiated my PCB design by collecting the required components. However, some items, such as the CH340G chip, DC Barrel Power Jack, and USB Female Type B connector, were not in stock at the electronics store nearby me, so I extracted them from an old Arduino.
Parts List
- ATMEGA328P-U Microcontroller * 1
- CH340G USB to TTL Converter * 1
- AMS1117 5V Voltage Regulator * 1
- 16MHz Crystal Quartz * 1
- 12MHz Crystal Quartz * 1
- 22pF Ceramic Capacitor * 4
- 100nF Ceramic Capacitor * 5
- 47uF Electrolytic Capacitor * 2
- 1K 0805 SMD Resistor * 6
- 10K 0603 SMD Resistor * 1
- 1206 SMD LED * 4
- Junction Diode * 1
- SMD Push Button * 1
- DC Barrel Power Jack * 1
- USB Female Type B connector * 1
- Female Pin Header * 1
- Microcontroller Socket * 1

Circuit Schematic and GERBER File
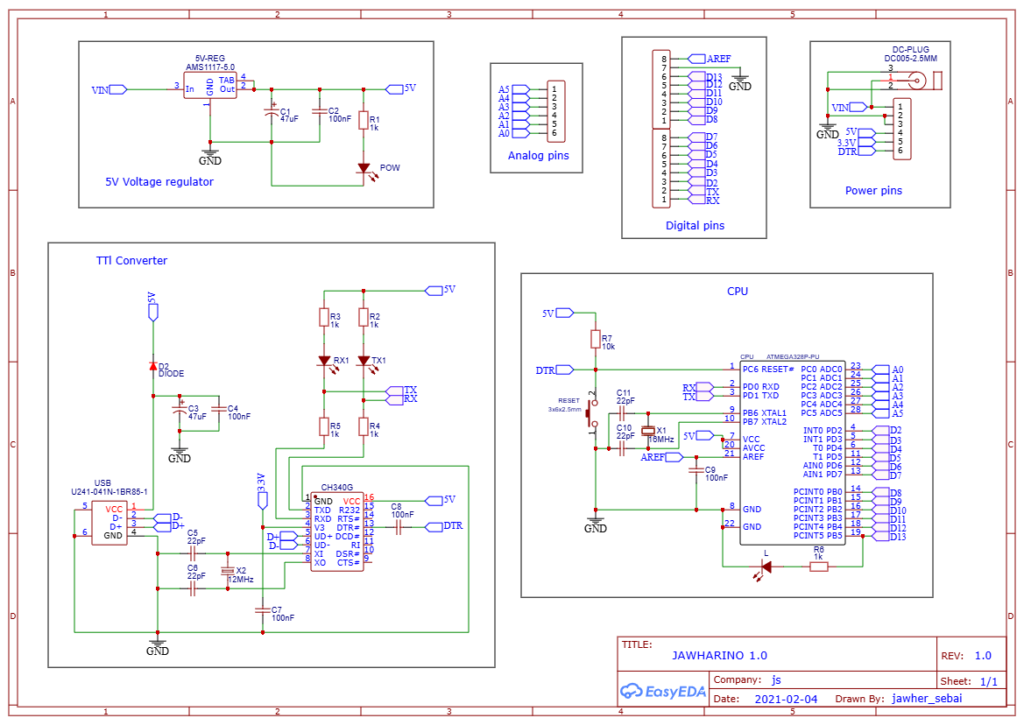
I utilized the online PCB design tool, EasyEDA, to create my schematic and design the PCB. You are welcome to Open them in editor and Download the Gerber file.

AVCC is the supply voltage pin for the internal ADC (Analog to Digital Converter) of the ATMEGA328P-U chip. And it should be connected to 5V so the ADC can work.
AREF means Analog REFerence and we use it to increase the internal accuracy of the ADC (Analog to Digital Converter) of the microcontroller
Making the Circuit Board
I placed an order with jlcpcb and the cost for the five boards was 2 dollars, with an additional 19.18 dollars for FedEx International Priority shipping to Tunisia.

After installing and soldering all the components, I inserted the ATmega328P-U microcontroller, which had a bootloader pre-installed. If you have a new ATmega328P-U microcontroller and you don’t know how to install a bootloader into it, then follow this tutorial.
I connected my board to my computer, selected the appropriate port and board type, and opened the Blynk Sketch. Upon clicking ‘Upload’, the code was successfully transferred, and the built-in LED cycled ON for one second and OFF for another second in a continuous loop.

That was my Jawharino UNO! I’ve always been fascinated by Arduino boards and wanted to try building my own and learn more about making a PCB. Now participating in a robotics competition with a custom board could enhance my chances of winning, as I may earn additional points for not using a commercial Arduino board.

est-ce que vous pouvez faire un video pour comment faire un environnement de simulation avancée pour le microcontroleur atmega2560
oui bien sûr je le ferai à l’avenir
Bon courage
merci