ESP32 Boards Error in Arduino IDE — Here’s How I Fixed It!
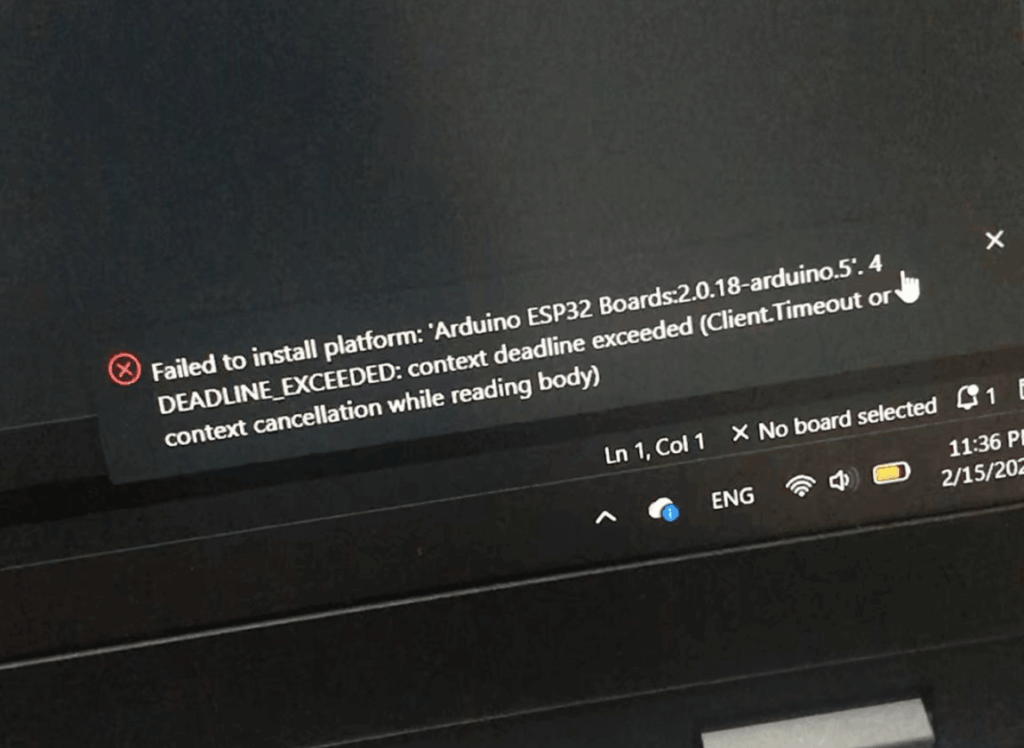
When I first tried to install the ESP32 boards in the Arduino IDE using the standard Boards Manager, I ran into a frustrating error.
This timeout error prevented me from completing the installation, and after several attempts, I realized that relying on the automated process wasn’t going to work. That’s when I decided to switch to a manual installation method.
In this article, I’ll walk you through the exact steps I followed to manually install the ESP32 boards in the Arduino IDE.
Download the ESP32 Core Source
To begin, you’ll need to grab the latest source files directly from the Official Espressif GitHub Repository. Simply click the green “Code” button, select “Download ZIP,” and save it to your computer.
arduino-esp32-master. This contains all the core files we’ll be placing into the Arduino directory in the next step.Locate Your Sketchbook
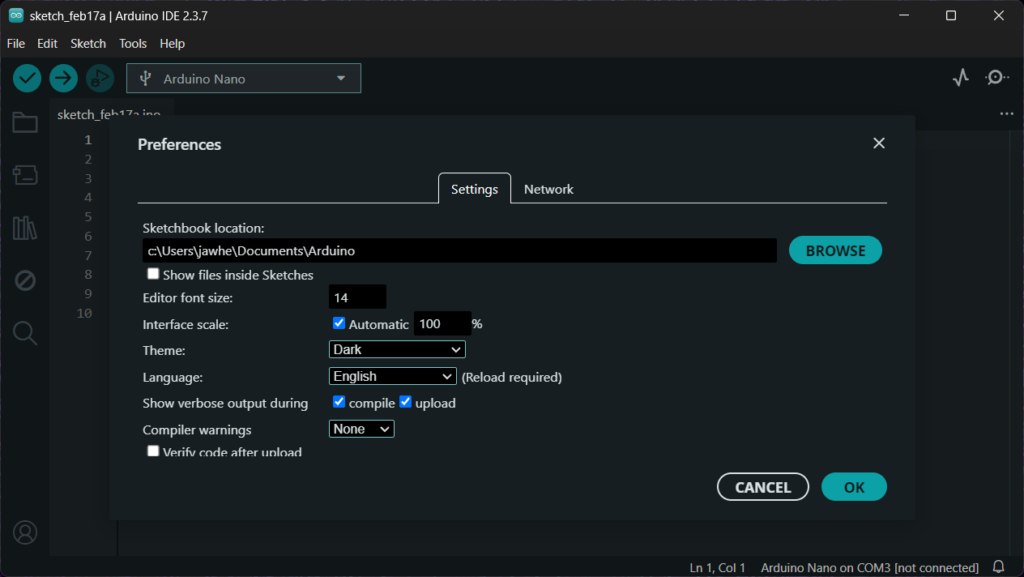
- Open the Arduino IDE.
- Go to File > Preferences.
- Note the path listed under Sketchbook location (on Windows, this is usually
Documents/Arduino).
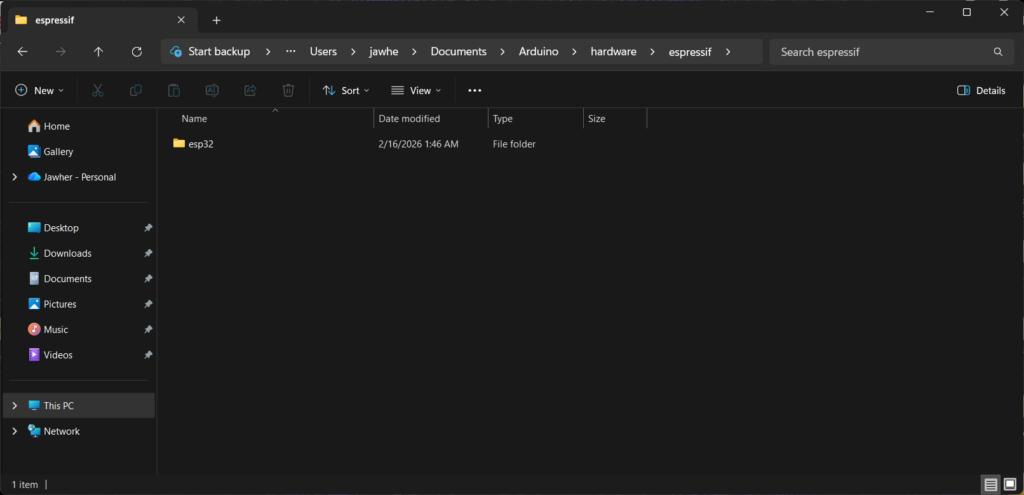
Create the Hardware Folder Structure
The Arduino IDE requires a specific “nesting” of folders to recognize the new hardware.
- Navigate to your Sketchbook location in File Explorer.
- Create a folder named
hardware. - Inside
hardware, create a folder namedespressif. - Inside
espressif, paste your downloaded ESP32 core folder and rename it simply toesp32.
Your final path must look like this:
Documents/Arduino/hardware/espressif/esp32/
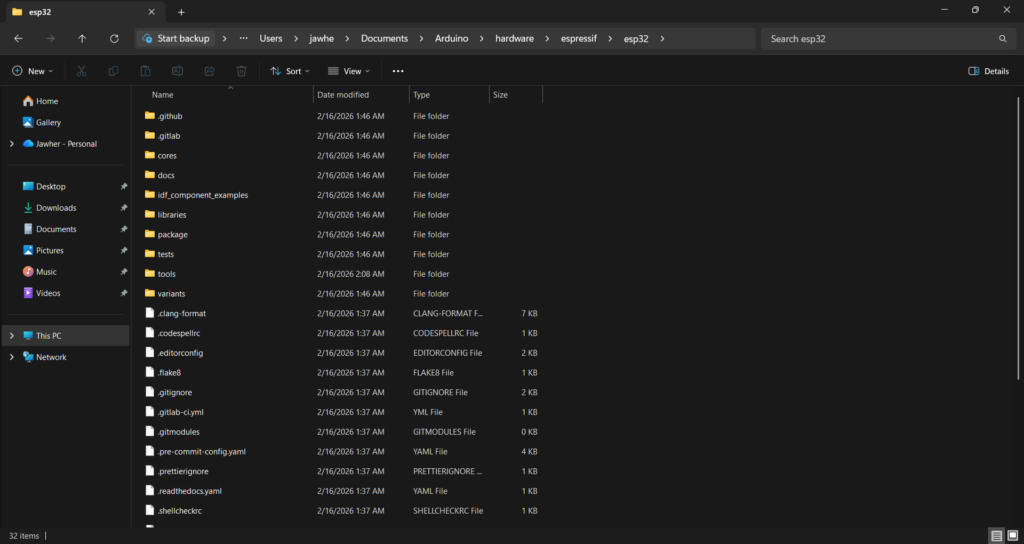
Run the Tool Compiler
Even with all the folders in the right place, there is one last thing to do. You need to download the “compiler,” which is the engine that actually turns your code into a language the ESP32 chip understands.
To finish the installation:
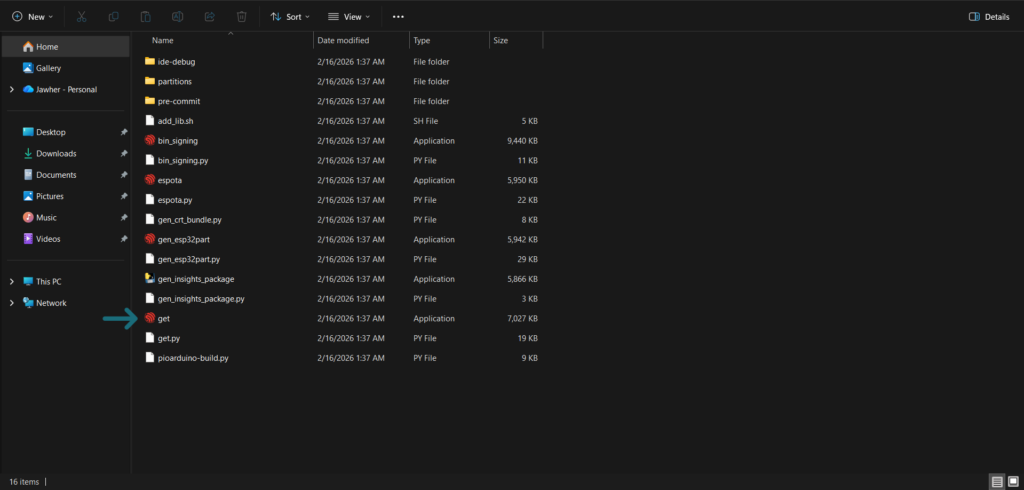
- Find the ‘tools’ folder: It’s right there inside the
esp32folder you just set up. - Run ‘get.exe’: Inside the
toolsfolder, look for a file called get.exe. Right-click it and select Run as Administrator.
Now wait for the magic! A black window will pop up and start downloading files. This procedure can take anywhere from 10 to 15 minutes depending on your internet.
After downloading the ESP32 package, the installation window will close automatically, indicating that the process is complete.
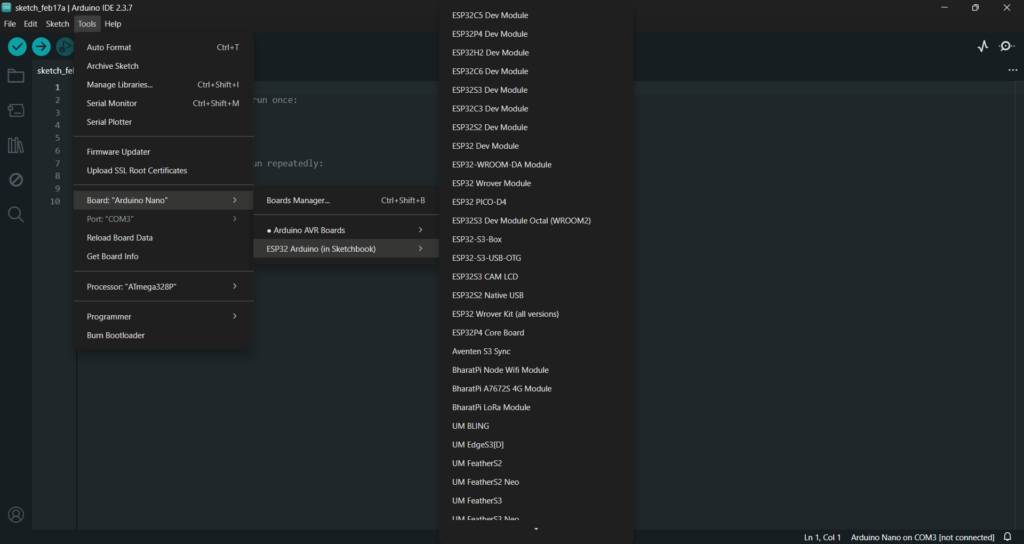
To verify that the manual installation was successful, restart the Arduino IDE. Then, navigate to Tools > Board and check the list of available boards. If the installation worked correctly, you should see options such as ESP32 Dev Module, ESP32 Wrover Module, and other ESP32 variants.
That’s it! Once your ESP32 boards are showing up in the Arduino IDE, you’re ready to dive into your projects and start experimenting. For me, this process was a little tricky at first, but it pushed me to search for answers, learn new things, and understand the setup more deeply.
If you’ve faced the same ESP32 error, I hope this post helped you tackle the issue and taught you something new. Thanks for reading, and I’ll see you in the next post!
Jawher